How to Use Watercolor Pencils Without Ruining the Paper
October 27, 2026
Key Takeaways
- Watercolor pencils work four ways: color dry then wash with a damp brush, lift pigment off the tip with a wet brush, draw with a dry pencil onto damp paper, or dip the tip for the fastest and least controllable line.
- The binder is the entire difference. Watercolor cores hold pigment in a water-soluble gum binder, while standard colored pencils such as Prismacolor Premier and Faber-Castell Polychromos use wax or oil binders that water cannot dissolve.
- Paper weight changes the result more than the pencil brand does. Printer paper is 20 lb, cardstock runs 65 lb to 110 lb, and watercolor paper is usually 140 lb, so a page printed on copy paper buckles and pills if you flood it.
- Use a barely damp brush and finish one small shape at a time, because a wet brush keeps moving pigment for as long as the paper stays wet.
Who this is for: Beginners who own a tin of watercolor pencils and want to use them on printable coloring pages without wrecking the sheet.
Watercolor pencils look like an easy win. You color the way you always have, brush water over it, and the page turns into a painting. Then the first attempt goes grey, the paper wrinkles, and the tin goes back in the drawer.
Almost none of that is your technique. It is water volume and paper weight, and both are easy to fix once someone gives you the numbers. This guide covers what makes these pencils dissolve, the four ways to use them, the paper problem nobody mentions when you print pages at home, and a walkthrough for your first page.
What Watercolor Pencils Are and How They Differ From Regular Colored Pencils
A watercolor pencil is a thin stick of pigment held together with a water-soluble gum binder, wrapped in wood. That binder is the only meaningful difference between it and the colored pencil beside it in the drawer.
Standard colored pencils bind pigment in wax or oil. Prismacolor Premier uses a soft wax core, Faber-Castell Polychromos an oil core, and neither dissolves in water, because wax and oil do not take up water. Swap the binder for gum and the same pigment releases the moment a wet brush touches it.
Two things follow, and both surprise people. Used dry, a watercolor pencil behaves like a slightly harder, chalkier colored pencil: a perfectly good dry pencil, just not a soft one. And the pigment stays re-soluble after it dries, so a wash you laid yesterday lifts again if you brush over it today. That is usually a nuisance and occasionally a rescue.
Brands split along a useful line. Faber-Castell sells Albrecht Durer as its artist grade water-soluble range and Goldfaber Aqua as the cheaper student line. Derwent is the one worth knowing, because Derwent Watercolour re-wets forever while Derwent Inktense dries permanent, so once an Inktense wash dries you can paint across it without disturbing it. If you want to layer colors without the first one moving, that matters more than price.
Four Ways to Use Watercolor Pencils
Dry first, then wet. Color the shape as you normally would, then pull a damp brush across it. Learn this one first, because you see exactly how much pigment you laid down before water gets involved. Color lighter than feels right, since water roughly doubles the apparent intensity.
Lift from the tip. Hold a wet brush against the exposed core, load it like a pan of paint, then paint with the brush. You get real control over strength and no pencil texture survives into the shape. Use it for small areas that need flat, even color.
Dry pencil on damp paper. Wet the shape with clean water first, then draw into it. The line blooms instantly and lands far more intensely than either method above. Best way to get a dark accent, and the hardest to undo.
Dip the tip. Dip the point in water and draw. Quick, and the least controllable of the four: the dissolved core turns to mush, deposits unevenly, and the wood swells if you keep doing it. A trick for small marks, not a working method.
Paper Decides Everything on a Printed Page
Watercolor pencil tutorials skip this part, because they assume you bought a pad of watercolor paper. If you printed your page at home, you did not.
Standard printer paper is 20 lb. Cardstock runs 65 lb to 110 lb. Watercolor paper is usually 140 lb and is built to absorb water and stay flat. That gap explains almost every bad first attempt: flood a 20 lb sheet and the fibers swell, the sheet cockles into ridges, and the surface pills under the brush.
Match the method to the stock you actually have:
- 20 lb copy paper: lift from the tip and keep the brush barely damp. Finish one small shape at a time, and never wet the paper first.
- 65 lb to 110 lb cardstock: dry-then-wet works properly and light washes stay flat. The sweet spot for printed pages.
- 140 lb watercolor paper: everything works, including wetting the paper first. Most home printers feed a sheet this heavy from the rear or manual tray.
This inverts the advice for crayons, where plain 20 lb paper is the right choice because wax sits on the surface and never asks the fibers to do anything. Water asks a lot of them. For the full breakdown of stocks and printer settings, see best printer paper for coloring pages.
Your First Page, Step by Step
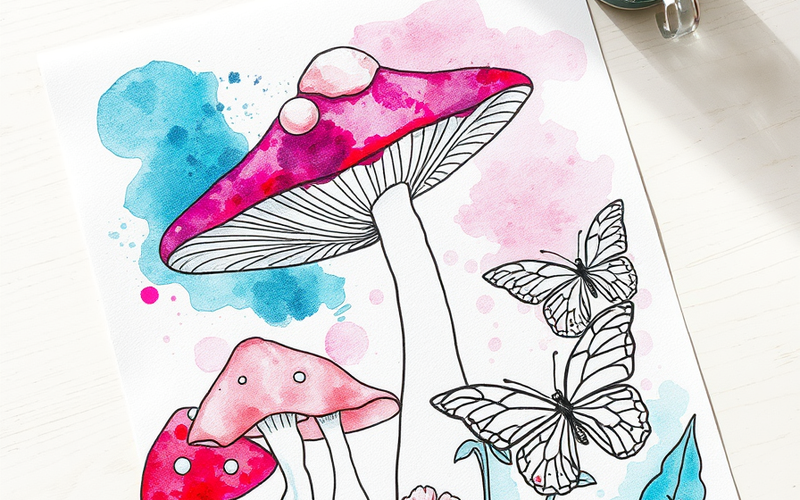
Pick a page with large, clearly separated shapes. Big open areas are forgiving, and hard borders between them stop one wet color running into the next. Mushroom coloring pages are close to ideal, since caps are broad and stems give you somewhere to park a second color. Butterfly pages work the same way. Save lotus mandalas and art nouveau pages for later, because their small enclosed shapes need a brush tip you can trust. Every page on those four hubs downloads free as a printable PDF, with no sign-up and no account.
Then:
- Lay the lightest color first, dry, across the whole shape, pressing lightly. Aim for about half the intensity you want.
- Add the darker color only where the shadow belongs, usually one edge and wherever two shapes meet.
- Dampen the brush and blot it on a paper towel until it leaves no puddle on your fingertip. This one step prevents most buckling.
- Brush from the light area into the dark one, following the shape instead of scrubbing. Pigment travels with the brush, so working light to dark keeps the dark color out of the highlight.
- Let it dry completely before touching the shape beside it. A dry border stops two colors bleeding together.
- Go back in with a dry pencil to sharpen edges and add detail. That is where these pages start looking finished.
If a wash dries paler than you wanted, lay more dry color on top and wash again. These pencils re-wet, so a weak first pass costs nothing. How to blend colored pencils goes deeper on building color in light passes.
Frequently Asked Questions
Do you dip watercolor pencils in water?
You can, but it is the weakest of the four methods. Dipping softens the core into mush that deposits unevenly, and repeated dipping swells the wood casing until the core loosens and breaks. Holding a wet brush against the dry tip gives you the same loaded color with far more control. Save dipping for small marks where precision does not matter.
What is the main difference between watercolor paint and watercolor pencils?
Control. Paint arrives already mixed with water and flows the moment it touches paper, while a pencil lets you place dry pigment exactly where you want it and decide later how much dissolves. Pencils are better for detail and for coloring inside printed lines. Paint covers large areas faster and gives smoother washes.
Can you use watercolor pencils without water?
Yes. Used dry they work like ordinary colored pencils, just slightly harder and chalkier than a soft wax pencil such as Prismacolor Premier. Plenty of people color a whole page dry and wash only two or three shapes for contrast. Worth knowing: dry pigment stays water-soluble, so a spilled drink will still smear a finished page.
How do you flatten a page that buckled after you added water?
Let it dry fully, then press it for a few hours under something heavy and even, such as a stack of books with a clean sheet on either side. That recovers most light cockling. Deep ridges in 20 lb paper never fully disappear, because the fibers stretched while wet. Prevention is cheaper: blot the brush and print on heavier stock.
Start With One Shape
Watercolor pencils reward restraint. Less water than you think, lighter dry color than feels right, one shape finished before the next is started. Get those three habits down and your fourth attempt will look nothing like your first.
Learn the feel on a page you do not mind sacrificing, so print two and treat the first as a test. Browse coloringden.com for something with big open shapes, from mushrooms and rainbows to butterflies. Every page is free, printable, and downloads instantly as a PDF with no sign-up required.